How to display Formito chatbot on bottom corner of my Shopify store?
This guide helps you to add Formito to your Shopify store. If you have not created a chatbot yet and you are not familiar with Formito, it's recommended to read our getting started guide first.
Floating Button
Floating button is usually a fixed positioned button that appears at the bottom right corner of a website. It might have a popover message and clicking the button opens the chatbot. You can get the code from your dashboard if you click the share button and navigate to the Floating Button tab. From there, you are able to change the button icon, color, position, shape, and message. The generated code will be similar to the below code if you leave it with default settings. Please note that {APP_ID} should be replaced with your Formito chatbot ID.
<div data-formito-id="{APP_ID}" data-trigger="fab"></div>
Once you have the code ready, you should decide to show the chatbot on all pages or a specific page.
Show on all pages
This one is super easy. Actually, it’s as easy as pressing a button! Once the code is ready, click the “Add to my shop” button and it automatically adds it to your Shopify store. Click the “Remove from my shop” button and the chatbot removes from your website.

Show on a specific page
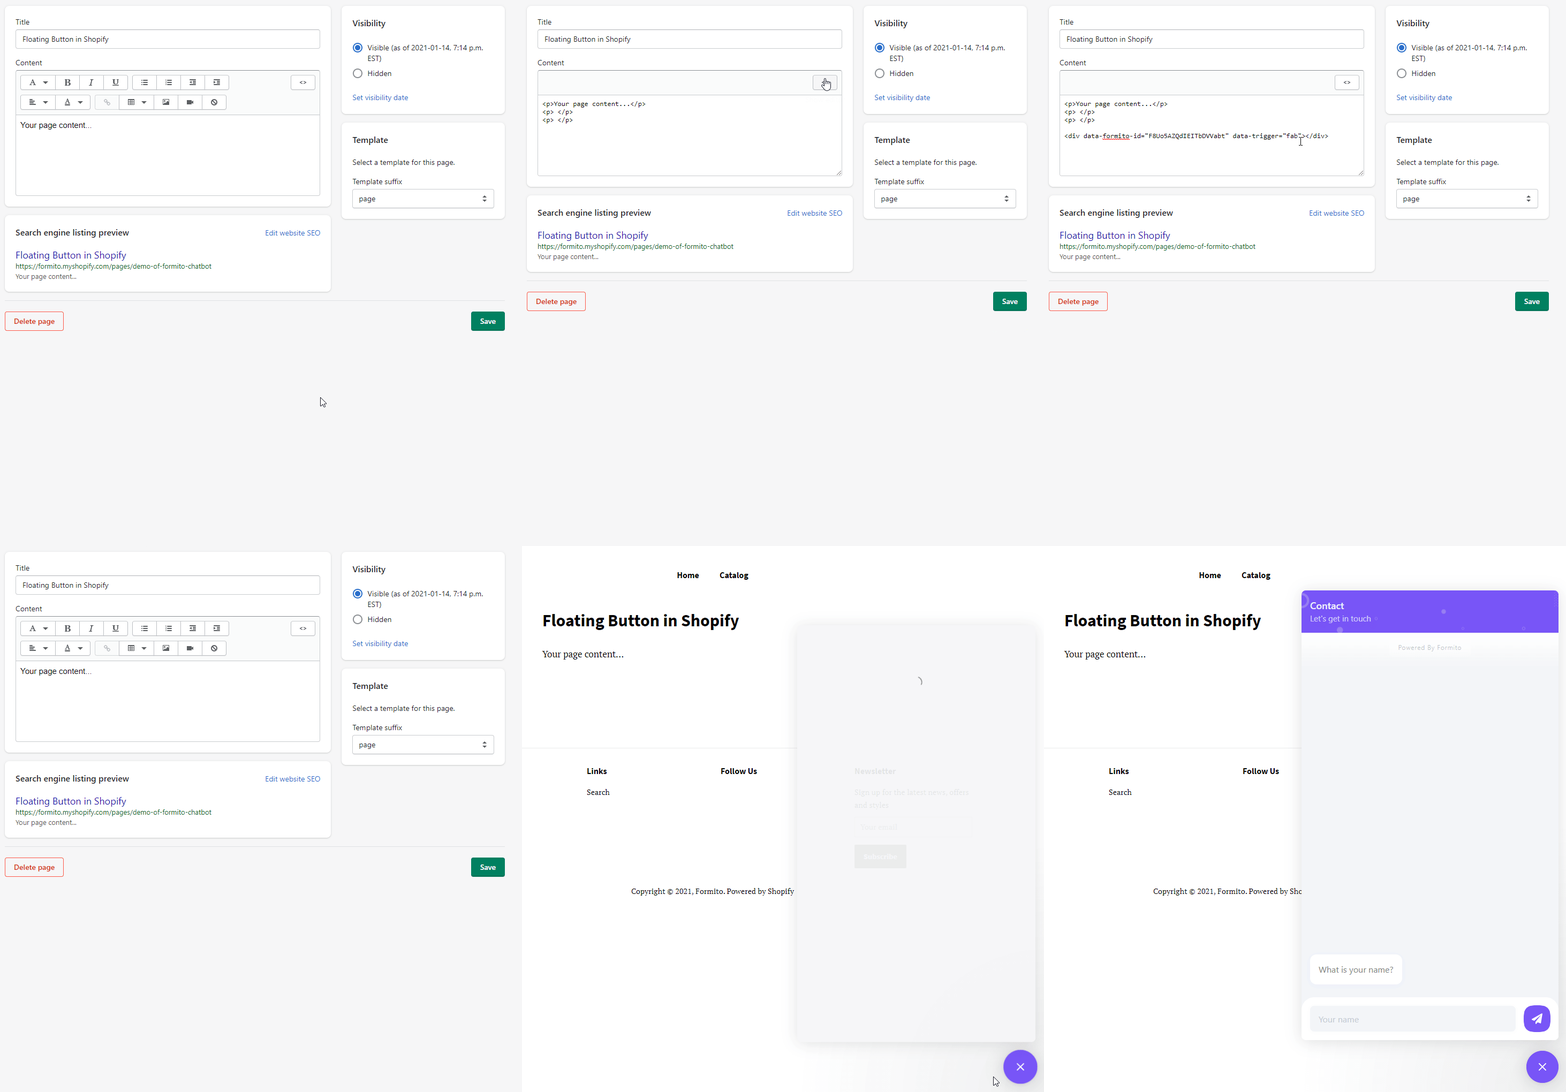
Sometimes, you don’t need a global chatbot. Instead, you want to create multiple chatbots to display on different pages. For this scenario, you need to add the generated code to your page and the easiest method is to add it through your Shopify content editor. Simply, edit the page, post, or product you want to have the chatbot in, click the “Show HTML” button on top-right side of the editor, and paste the code at the bottom of the page.

Still need help?
No worries! Contact us and we'll be happy to help.